Guides
Call of Duty Warzone Error Codes: How To Fix Them – 2024 Guide
Sometimes errors appear when launching Call of Duty Warzone. It is unpleasant, but the game you installed may not start, crashing, freezing, showing a black screen, and giving errors in windows. Therefore, quite logical questions arise: “What to do?”, “Why is this happening?” and “How to solve the problem?” We tried to collect all the necessary information with instructions, tips, various programs, and libraries that are designed to help solve the most common errors associated with Call of Duty Warzone.
Required software for Call of Duty Warzone
We strongly recommend that you read the links to various useful programs. What for? A huge number of bugs and problems in Call of Duty: Warzone is associated with not installed / not updated drivers and the lack of necessary libraries.
- The latest version of Nvidia GeForce driver.
- Latest AMD Radeon driver.
- DirectX package.
- Microsoft .NET Framework 3.5 library. Microsoft .NET Framework 4 library.
- Library Microsoft Visual C ++ 2015 & library of Microsoft Visual C ++ 2013
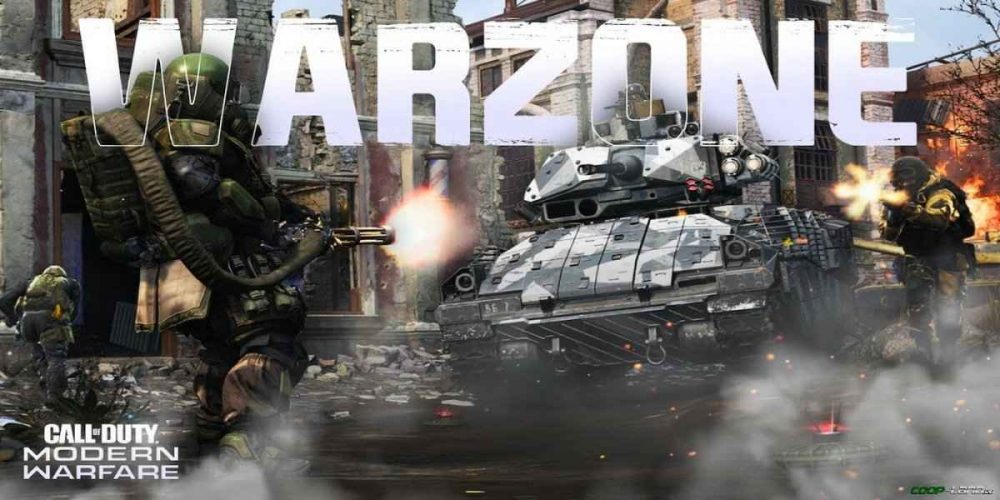
Warzone Error Codes:
Error “Incoming Transmission”
If the “Incoming Transmission” error appears in Call of Duty: Warzone, and the game does not let the game go further than the main menu, you need to exit the game and check it for updates. Because the reason for this error is always the same – a “fresh” update has come out and you need to update. Unfortunately, the game does not report this directly from the menu, so you need to check for the next update personally.
Error “6071” or “DEV ERROR 6071”
The “DEV ERROR 6071” error in Call of Duty: Warzone is not widespread, but its popularity is growing as more and more users install the new “Battle Royale” and, accordingly, play it or just try. Every day the number of people who need a solution to this error is growing, and while the developers are working on the patch, we suggest that you familiarize yourself with our tips for fixing the problem:
- You must run Call of Duty: Warzone as administrator (in the “Battle.net” launcher, select the game press RMB in the menu, click “Show in Explorer” find the .exe file of the game by file choose “Properties” switch to “Compatibility” choose the option that says “Run this program as an administrator” at the end, be sure to click “Apply”)
- You need to run the “Battle.net” client as an administrator (click by launcher icon choose the “Properties” option in the window that opens, switch to “Compatibility” choose the option that says “Run this program as an administrator” at the end, be sure to click “Apply”)
- You need to start the process of restoring the game files (for this, open “Battle.net” open “Properties” choose the option “Check and restore” click “Start check” at the end, be sure to restart the system)
- Temporarily disable all sorts of third-party applications (like “NZXT Cam” or “MSI Afterburner”) and overlays (“AMD” or “NVidia”) that also run in the background.
- In the game settings, you need to lower the “Maximum frame rate” option to 60 FPS or to any other indicator at which you are sure that Call of Duty: Warzone should work stably.
- As a last resort, if none of the advice has helped, we suggest switching to the standard settings under the condition of the overclocked video card, and plus in the graphics settings switch to “Full-screen mode (no frame)”.
Black screen / Black or colored squares / Black textures
At the moment, Call of Duty: Warzone has two very serious and extremely unpleasant bugs, because of which it becomes simply impossible to play: the screen is either covered with black textures, or black/colored squares appear. Moreover, this is not a black screen in the usual sense, because certain objects are displayed, and colored squares can start running around the screen as the character moves.
Such errors always appear in two cases. In the first – at the login stage, instead of the usual screen, a black one appears, after which Call of Duty: Warzone it hangs corny. In the second case, already in battle, where black squares appear, gradually turning into a black screen, on which only interface elements are displayed. Thus, even if both mistakes do not allow you to play in the same sophisticated way, they obviously have completely different origins, therefore, one should “fight” in different ways:
- The first case is the most difficult because there is no 100% working way, you just have to wait for the appropriate update and take a standard set of measures (you need to restart the game, the system, check the drivers for updates and clear the cache), which slightly reduce the frequency of the bug.
- In the second case, this happens most often for those who have an overclocked video card, so we recommend lowering the memory frequency of your graphics card (the “Memory Clock” option is responsible for this) in the “MSI Afterburner” application and best of all to the standard level. In addition, do not forget that such problems can also arise due to the overheating of the video card, so do not disregard this information.
COD Warzone Error BLZBNTBNA00000005: Attempting to wake the Blizzard Update Agent from sleep
The huge message “Attempting to wake the Blizzard Update Agent from sleep” with the code “BLZBNTBNA00000005” says that the Battle.net launcher servers are not working or, more simply, “are down”.
Servers can be shut down for various reasons: there are technical problems, some major update is being prepared for release, the launcher is overloaded and much more. But if you checked the status of the servers using, for example, the Downdetector service and it turned out that they are working, then the reason is something else.
We recommend that you familiarize yourself with the troubleshooting steps below, which will not only help resolve the issue, but these tips can also help you determine the reason why the Blizzard Agent is “asleep.”
Reason one – Battle.Net
An extremely popular cause of this issue on the official Blizzard forum. The reason is that the launcher could not update normally, so some kind of failure occurred, and the files turned out to be “broken”, for the solution it is necessary:
- Complete all processes related to “Battle.net” in the task manager, otherwise, everything that has to be deleted in the following points, the agent will create again.
- Delete all “Battle.net” folders that are located at C: \ ProgramData \ Battle.net.
- Delete the “Battle.net” folder located at C: \ Users \ User \ AppData \ Local \ Battle.net.
- Delete the “Battle.net” folder located at C: \ Users \ User \ AppData \ Roaming \ Battle.net.
- And be sure to delete the ” Blizzard Entertainment ” folder.
Please note that the location of these folders may differ, but in any case, after deleting them, you need to launch Call of Duty: Warzone using a shortcut on the desktop. As for the rest, the matter is small – log in and start the game.
Reason two – Antivirus
In general, it is quite a standard reason when antivirus prevents the Battle.net service from functioning normally. By the way, it is worth noting that in most cases the fault lies with “AVG Antivirus“, so in our case, it will be considered, but if you do not have it, you need to do a similar procedure with another antivirus and “Windows Firewall”:
- Open “AVG Antivirus” go to “Settings” choose “Full protection” from the left side in the menu click on the “Improved Firewall” option.
- A new window with the “Improved Firewall” functions will now open in front of you, where you should scroll down the menu to the very bottom and find the “Packet Rules” item (highlighted in large letters).
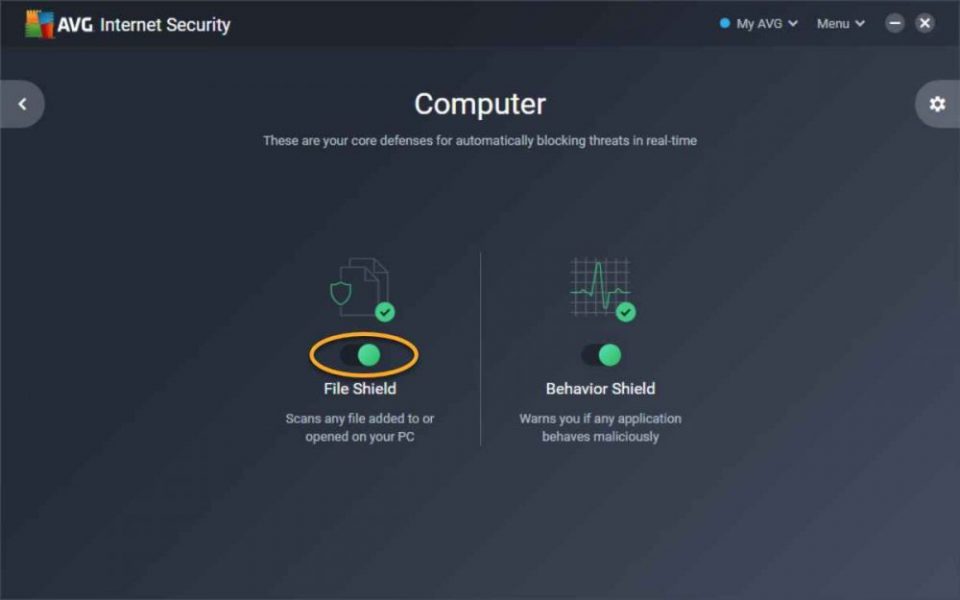
- Next, you should definitely look at which port the problematic Battle.net launcher agent is opening on. And usually, the address where you can find out this very port is as follows – C: /ProgramData/Battle.net/Agent/Agent.6700/Logs. There are several of them, in which case you should select only one of them.
- Now, in the field called “Local port” you need to write the number of the port that you have specified in the line that says “The agent is running in the port …”, and it does not matter what port number is there.
- Next, in the field called “Remote port” it is important to write the number that is indicated after the colon in the line that says “Checking the status of the network connection …”.
- After all this, you can select “Allow” for the Battle.net launcher (along the way, you will need to add the “TCP / UDP” protocols, as well as “Input / Output”).
- And at the end, you need to rearrange the created exception to the very top of the list to push OK and restart launcher to check the performance of the game.
If nothing, unfortunately, helped, then there are only two ways. The first one is to try to launch the game directly through the .exe file, but it is dubious since most likely there will be no connection to the server, although some users claim the opposite. The second is to completely reinstall the Battle.net client, but before that, be sure to check the status of the launcher servers.
COD Warzone Error BLZBNTBGS000003F8 “Server is disconnected”

This is an old problem with the Call of Duty series, as it has been around since Black Ops 4. Moreover, technical support offers a standard set of tips: check for information about the current problems of the game, whether you are launching the game using Battle.net, whether you are logged in correctly, and whether there are problems with your Internet connection. And, of course, none of this will give absolutely no effect, but then what to do?
Option One – Use VPN
It cannot be said that VPN helps most users, but it helps some English speaking players to get rid of the annoying “Server is down” message. Therefore, we recommend that you try this option first.
Option two – Install ports and change region
But changing ports with the region is recommended not only by English-speaking users but also by players abroad, although the method is rather complicated. Therefore, if you do not know how to do this, we suggest that you read our detailed instructions:
- Enter the “Control Panel” go to the “Advanced options” then click on “Rules for incoming connections” choose “Create rule”.
- Now in the field for the port, enter “TCP” from the official website of Activision (see the screenshot below for convenience) always press “Next” until you have to add a name (let it be “Call of Duty”).

- At the same time, absolutely the same manipulations must be carried out with the UDP port.
- And now all that remains to be done is to change the server to the European one, and in the game, window to change the region, for example, to America reboot the system go into the game and check it for stability.
- At the same time, absolutely the same manipulations must be carried out with the UDP port.
- And now all that remains to be done is to change the server to the European one, and in the game, window to change the region, for example, to America reboot the system go into the game, and check it for stability.
“A fatal DirectX error has occurred” or Crashes with a DirectX error
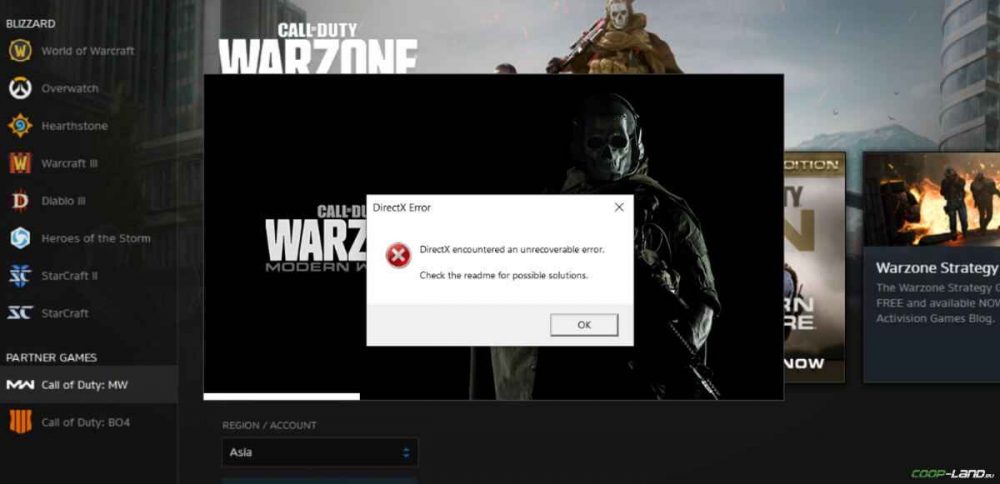
Unfortunately, the exact answer to the question “What causes the DirectX error in Call of Duty?” is not available. Even though it appeared in an old game like Black Ops 2 and other games in the Call of Duty series. At the same time, technical support still cannot give an unambiguous answer, and even more so, recommendations for eliminating the problem.
In this regard, below we decided to collect all the known ways to eliminate this error, which, although they do not help everyone, still they help and give the desired result:
Method one – Run with the command
- Right-click on the Call of Duty: Warzone shortcut and choose “File location”.
- In the window that opens, find the file with the game launcher and the .exe file of the game itself.
- With each file in the “Properties” in the “Compatibility” tab, you must do the following: put a tick next to the option “Run as administrator” incompatibility, choose Windows 7, and be sure to check the box above (we remind you that all this must be done with each of the above files).
- Click “Apply” and close the window.
- Now you need to write a code in the Battle.net launcher for the game, without which Warzone will not start with the set parameters in the properties, so to do this, go to the “Settings” of the game choose “Game settings” next to the item “Additional command-line arguments” set a check mark “, and in the line itself write the command -d3d11 press OK and check the game for updates and launch it.
Finally, we note that in some cases, using this method, you can do without changing the compatibility with the Windows 7 operating system, leaving everything as it is. Therefore, if all else fails, try to do the same, but without setting compatibility with Win 7.
Method two – disable “RivaTuner Statistics Server”
Some users claim that they were helped by disabling the ” RivaTuner Statistics Server ” application that comes with MSI Afterburner. Alternatively, disable this utility and any other similar ones that run in the background along with Call of Duty: Warzone.
Call Of Duty Warzone DEV ERROR 6036
This error in Warzone always occurs for one reason – there was a lack of memory. It is possible that this happened after the update, so the game worked fine up to this point, and now it began to crash unexpectedly. And the tips for solving the problem in this regard are quite standard:
- Disable all background applications and even more overlays.
- Lower the quality of the graphics.
- Use the swap file.
- Turn off the caching options for spots and sun shadows.
Chat or microphone not working in the game and Other audio problems
First, check the volume level in the game settings, after which, if you have several audio devices connected to the console or computer, you should check the connection of the headset, microphone and, without fail, speakers:
- On Xbox One and PlayStation 4, open Settings select “Devices” then find and click on “Audio devices”.
- On a computer or laptop, click on the volume control icon located in the tray then select the option “Recorders”, where you start to check which microphones are not connected and which are connected now go to the “Playback” tab, where you check the operation of the speakers and headphones.
And this, unfortunately, is all that can be done with sound in Call of Duty: Warzone at the moment, if standard methods of solving problems with sound did not help. Therefore, when the game has problems with the sounds of shots, the sounds of vehicles in the game are doubled, bugs with the sounds of footsteps appear, or the sounds do not change in accordance with the vertical surface, you must wait for the corresponding patch from the developers. Because all the sound problems are due to a poorly designed audio engine, as is the case with CoD: Modern Warfare 2019.
And if you want to know what they are going to fix in the near future, as well as what the developers will work on, then you can familiarize yourself with the official work plan on Trello where they actively share relevant information.
Call Of Duty Warzone DEV ERROR 5759
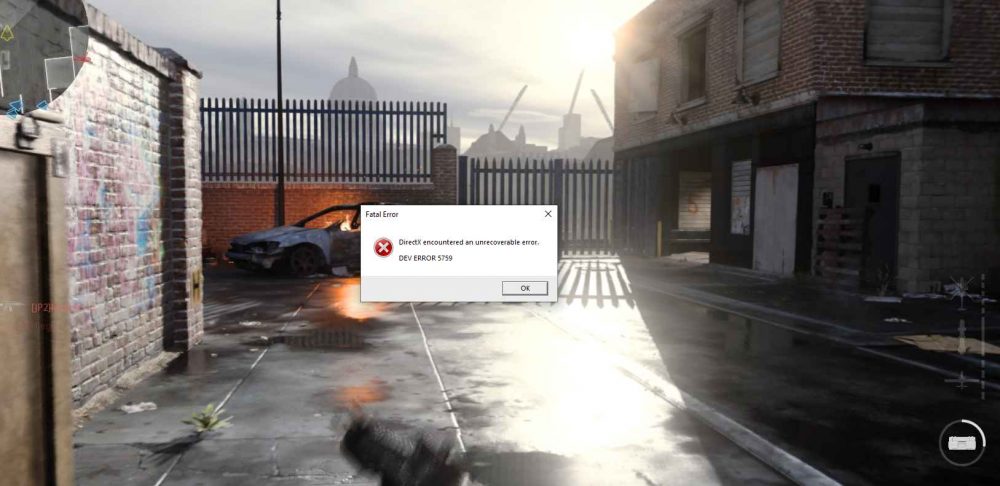
It is difficult to say what exactly this error is related to, as sometimes it says that the video card does not meet the minimum requirements or an error has been found in the GPU, and sometimes that there are problems with the software. Moreover, most often with each item, there is complete order, as many users say. This is why when Call of Duty: Warzone crashes with the error “DEV ERROR 5759”, players are stumped, which is not surprising. However, there is a solution, and we suggest you take a closer look at it:
- First, you need to run the file recovery utility in Battle.net (open the launcher choose Call of Duty: Warzone open the menu under the game choose the option “Check and restore” click “Start to check” wait until the end of the process).
- Make sure to check for the latest updates for video card drivers and Windows 10.
- And after you go through the stage of updating everything that is necessary, disable the built-in video card with the second monitor (if possible, then it is better to disconnect and play all together, thus, until the error is resolved by the developers, but otherwise you can try to connect/turn on devices again).
COD Warzone Crashes With memory Error 9-531
An unpleasant error that occurs right during the game in the midst of a battle: at first Warzone hangs corny, after which it crashes. And surprisingly, “Memory Error 9-531” has nothing to do with RAM, although it points to it. To resolve this error, we recommend that you read the following tips:
- The first step is to temporarily disable the crossplay mode (for this, go to the “Options” of the game find and click on “Account” select the item “Crossley” click “Disable”).
- If it does not help, then you should reboot the router and router reload Call of Duty: Warzone restart console/computer/laptop check drivers for new updates.
- If a complete reboot did not help, then you will have to resort to a radical way to solve the problem, which absolutely no one who plays the new version of Call of Duty likes, namely to completely reinstall the game (in this case, the problem will definitely disappear, as they say, many users).
Call Of Duty Warzone Error Code: 262146 & Error Code: 263234
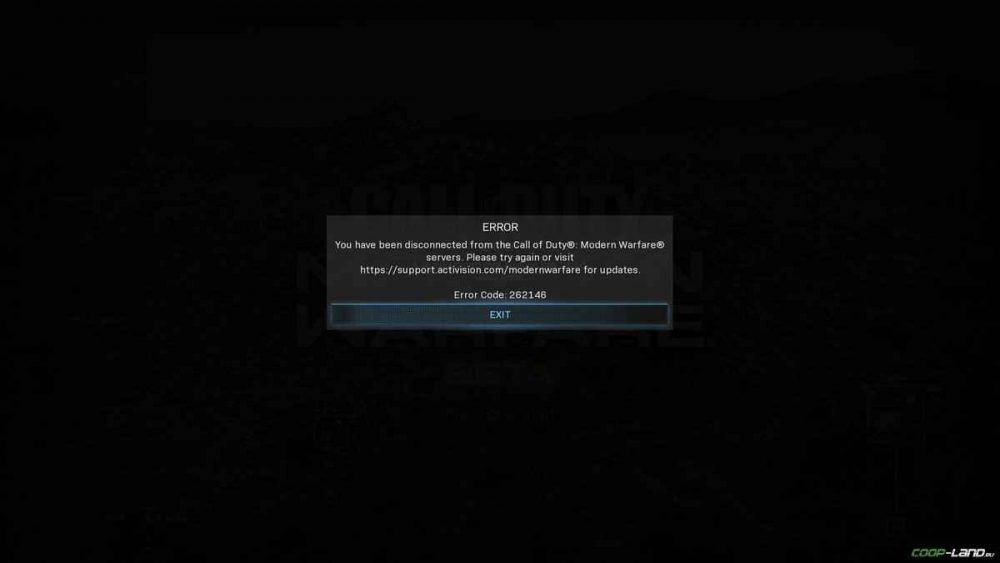
There are quite a few different bugs in Call of Duty: Warzone that indicate that there were problems connecting the game to the server. And error code 262146 together with 263234 belong precisely to this category of problems (although not as critical as many others), so if you checked the game servers, and they are in perfect order, you just need to restart the router, console (by turning off the power ), a computer or laptop, as well as the game itself. A completely standard procedure helps to get rid of these problems, which, in all likelihood, arise due to some kind of system failure.
The message “We are aware of an issue …” appears
If suddenly, after launching in Battle.net, the message “We are aware of an issue …” or “We know of a problem …” suddenly appears, then you need to wait a little while Blizzard’s technical support finishes working. This message always means that the developers are fixing some bugs. However, in extremely rare cases, this message can occur due to a system failure.
It is quite simple to check if the alert occurred by accident or by design: just restart the system and then try to enter the Battle.net launcher again. And if this message reappears, then we recommend that you periodically follow the official Blizzard Twitter account, where they promptly report this.
Crashes for an unknown reason without errors or messages
A fairly common problem in which Call of Duty: Warzone simply stops working. However, neither the game nor the operating system reports a problem. Plus, as usual, standard methods of solving the problem from technical support do not help in any way, and sometimes even exacerbate the situation by creating new errors.
For your awareness, we note that the problem arose a long time ago, and to solve it, the developers even released a patch that was supposed to fix random crashes, but many users still complain about them. On the other hand, things are far from so bad, because, apparently, random crashes usually occur with those who have an NVidia GTX 9 or 10 series video card.
And before you read the instructions below, we recommend that you definitely try: restart the game/system, lower the graphics settings, check for the latest driver updates, try to roll back the drivers to the previous version, clear the cache and reinstall shaders. Then you can proceed to more serious solutions:
Method one:
- Open the folder with Call of Duty: Warzone (if you cannot find it open Battle.net choose a game to choose “Settings” then click on the option “Show in Explorer”) and find another folder called ” main “, where you need to delete absolutely all content (we also recommend that you copy this folder first and save it so that in case of anything you can use it as a backup copy).
- Now you need to open the “Documents” folder to find the folder with the game, and in it the folder with the profile “Players” inside you need to delete the file called ” ppsod.dat “. It is important to know that sometimes there is nothing inside the folder (in this case, everything is fine, so you can safely proceed to the next step of the instruction) or there are two “Players” folders at once (then you need to delete the previously mentioned file in each folder).
- Next, open the “Task Manager” using the keyboard shortcut Ctrl + Shift + Esc switch to “Processes” close absolutely all processes associated with the Battle.net client (we are talking about the ” Blizzard Update Agent ” and ” Blizzard Battle.net App “).
- Use the built-in search to locate and delete the ” Blizzard Entertainment ” Battle.net folder or use the keyboard shortcut Win + R in the window that opens, write % programdata%, and click OK.
- An item for those who use a video card from NVidia. Open the “NV_Cache” folder (located at C: \ ProgramData \ NVIDIA Corporation ) and delete all content, but note that you need an Administrator account to delete it. In addition, if the system suddenly reports that any of the files are open, so it is impossible to delete it, skip this file/folder, and do this with everything in the folder.
- An item for those using an AMD graphics card. Open a folder called “amd”, which by default is always located at C: \ Users \ UserName \ appdata \ local \ amd find folders “GLCache” and “DXCache” delete all content in both folders.
- Next, open the “Windows Disk Cleanup Utility”, which is built into the operating system (if you don’t know where it is, then just write disk cleanup in the search bar ) after opening, immediately start the “Disk Cleanup (C :)” process (for this you need to select the disk and click OK) in the optional list, where you can choose to delete files, you need to leave only “DirectX Shader Cache” (aka “DirectX texture builder cache”) push OK… And it is important that if there are several disks on your PC, in exactly the same way you need to open the rest of the disks to clear the DirectX Texture Builder cache.
After what has been done, you need to switch to the game itself, but before that, you should consider several important points. Firstly, after launching Battle.net, the client will literally immediately show a red loading panel and inform that the update is complete, but you shouldn’t be afraid of what is happening and you shouldn’t do something about it, everything is fine. Secondly, you need to start the process of restoring game files (click on the game open its properties click on “Check and Restore” run the check itself). And only after that you start interacting with the game:
- Start Call of Duty: Warzone and if a warning appears that there are outdated drivers or offers to load the process in safe mode, everything should be ignored. In addition, after the system has found an update for the game, you should not press anything, and even more so restart it in no case. The key point is to leave the game in this indeterminate state for ten minutes.
- After ten minutes Warzone can be restarted after restarting, you must again leave the game in the main menu for ten minutes further, it is important to launch an educational game with bots and if CoD: Warzone does not crash, then you can safely connect to the multiplayer mode with other users.
Method two:
- Open the Documents folder find the game folder completely remove it.
- Now you should check the status of the function that is responsible for caching shaders (open the window with the “NVidia Control Panel” on the left side, select “Manage 3D parameters” click on “Global parameters” in the list with parameters that opens, find and enable the option that refers to “Shader caching”).
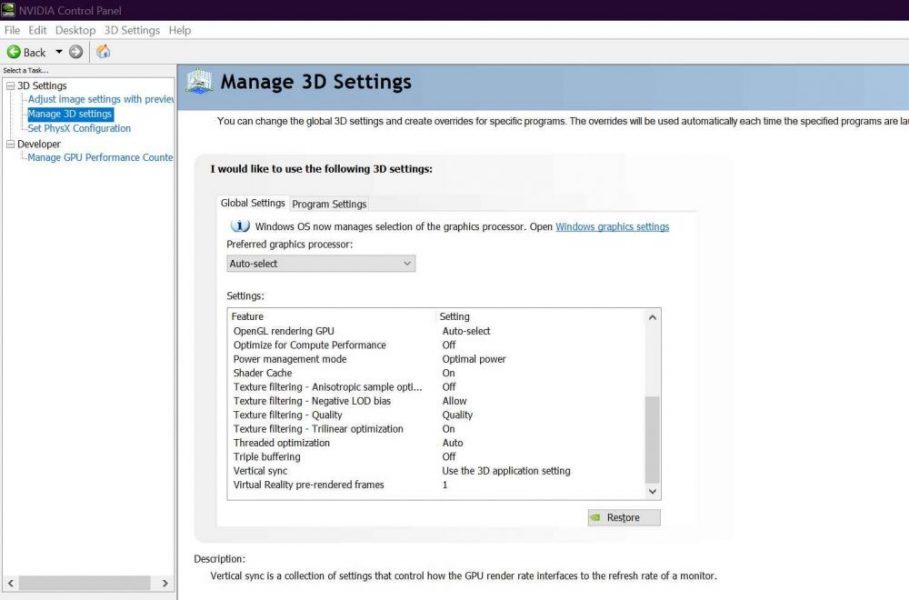
- An important point of this method is that if you have an overclocked video card, then it is better to temporarily return it to the standard options, and it will also not be superfluous to disable XMP profiles.
- Finally, it remains only to update the drivers for the AMD or NVidia video card to the latest version at the moment reboot the system restart the game.
If all of a sudden this did not help, but the system absolutely exactly meets the recommended system requirements, and Call of Duty: Warzone worked adequately until a certain point/update, but the above tips did not help, then the only way to get rid of this kind of crashes is to reinstall the game. This is all that can help in solving the problem, so in case of another fiasco, you will again have to wait for the patch to be released and hope that it will definitely fix this unpleasant problem.
Cod Warzone Memory Error 13-71
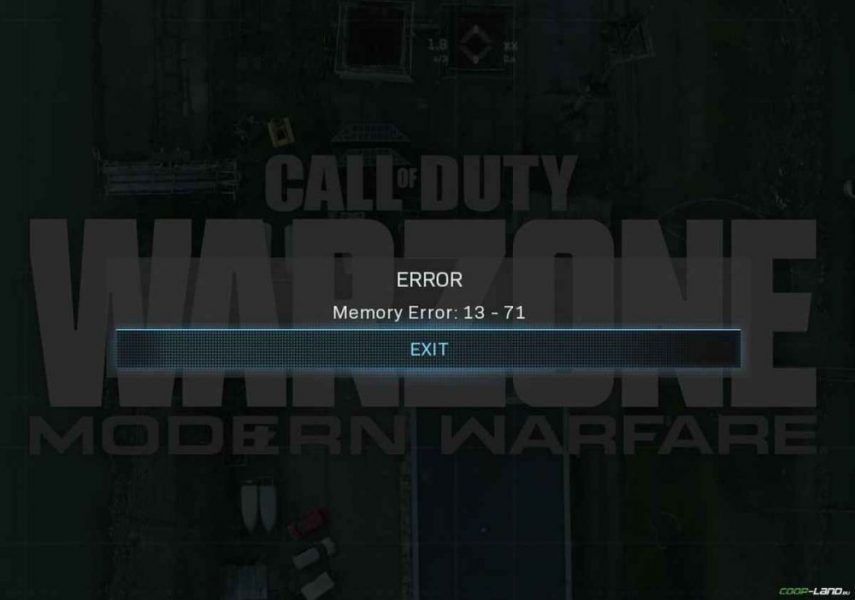
Activision’s technical support service is aware of this problem and promised to fix it more than a month ago, but after recent updates, users began to complain about the “Memory Error 13-71” error more often, so while the developers are idle, we suggest that you familiarize yourself with our working methods:
Method one:
The meaning of this method is that you need to log into CoD: Warzone through another account, having previously created a new one, or better, according to some users, create several additional ones at once. After that, as soon as the game crashes again with the same error, do the following:
- Click “Exit” switch to another profile (select “Change user” in the lower-left corner) return to the game.
- Following, being in the main menu, return to the main screen to switch back to your main profile.
- Now all that remains is to leave the platoon restart the game completely login and check if Warzone crashes with the same error.
Method two:
- If suddenly the error “Memory Error 13-71” refuses to start up a network game, then switch to local mode enter the game disable crossplay (for this select “Options” then choose the option “Account” click on “Crossplay” and disable).
- Return to the main menu of the game select the option “Multiplayer”, while ignoring the offer to activate cross-play mode at this moment.
- Leave the platoon at the end turn back the crossplay and restart the game.
Method three:
It is necessary to do almost everything that is indicated in the first method, only in this case you need to forcefully enter the offline mode. In other words, you need to turn off Wi-Fi or remove the cable from the computer. Immediately after that, you need to switch to “Local mode” (or literally “Switch to local mode”) and then quite familiar actions: connect the Internet connection, restart your computer/laptop and start Call of Duty Warzone again.
Call of Duty Warzone DEV ERROR 6328
The popularity of the error with the code “6328” can only be compared with “6071”, but if earlier it was considered local, now it is global because they are faced with it from now on absolutely all platforms, so if you encounter this problem, then you are far away are not alone. In addition, we have prepared tips to help correct the situation:
- Check the quality of the connection (restart the router, reconnect via cable).
- Be sure to update your graphics card drivers.
- Try switching the game to DirectX 11 (in the “Additional command-line arguments” of the launcher, write -d3d11, and press OK.
- Finally, if absolutely nothing helps, then use a proven method that will definitely solve the problem, namely reinstall the game.
Call of Duty Warzone DEV ERROR 6036
What else can you do if all else fails?
- Open the folder with Call of Duty: Warzone inside it is necessary to select all the files that come after the list with folders (the folders themselves should not be touched in any case) copy everything to any other folder on the desktop, that is, you need to make a backup.
- After the backup, delete all files in the game folder, launch Warzone in the launcher –> gets an error –> force the update into the menu.
Sometimes it happens that after deleting all these files, the game stops running, then you need to return the backup files back to the CoD: Warzone root folder. In this case, next in this case, you need to delete the “Data” folder (again, after creating a backup) and start the file recovery process in the Battle.net client (click on the name of the game choose “Properties” click on “Check and Restore” start checking). In the end, try to start the game again.
Nothing helped and the error “6036” continues to occur? In this case, it becomes clear that some files were damaged, but which ones are difficult to find out. Therefore, it is easier to reinstall the game, after completely removing the game with all the files. The method is radical but guaranteed to be effective.
ALSO READ: A Bad Break For Call of Duty Black Ops Cold War Fans, No Free Next-gen Upgrade!
The game won’t update or the update takes too long to load
Now Call of Duty: Warzone pleases more than usual with its download speed, and this applies exclusively to the CIS community. However, this is not surprising, because although not most of the errors, some are nevertheless related to the region, including this one. So if you suddenly notice how the game started downloading updates or downloading too long, do the following:
- Restart Battle.net tries starting the update process again (in general, the technical support of the launcher recommends restarting the client after any update, so keep in mind for the future).
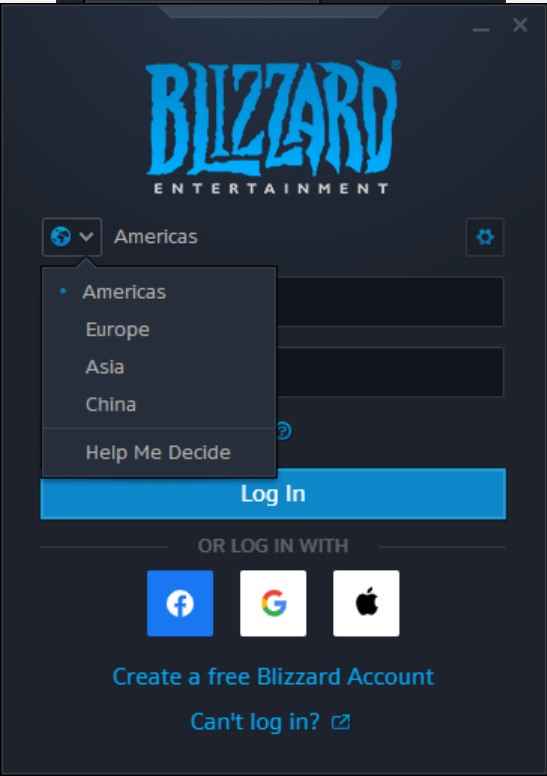
- During the client restart process, before starting to download the update again, change the region too, for example, America, after which you will notice a significant increase in the download speed.
Call of Duty Warzone Low FPS, lags, freezes or lags
Modern games are extremely resource-intensive, therefore, even if you have a modern computer, it is still better to disable unnecessary background processes (to increase the processor power) and use the methods described below to help get rid of lags and brakes.
- Start the task manager and in the processes find the line with the name of the game (Call of Duty: Warzone). Right-click on it and select “Priorities” in the menu, then set the value to “High”. Now all that remains is to restart the game.
- Remove all unnecessary from startup. To do this, all in the same task manager, you need to go to the “Startup” tab, where you need to disable unnecessary processes at system startup. It is better not to touch unfamiliar applications if you do not know what they are responsible for, otherwise, you risk ruining the system startup.
- We also recommend setting “Maximum performance” in settings related to power consumption. The same applies to the video card: you need to set the maximum performance in the graphics processor settings (you can do this in the “Manage 3D settings” ), and in the texture filtering select the “Quality” parameter.
- If your Nvidia video card is no older than the GTX 10 series of GPUs, then it is quite possible to raise the frame rate by speeding up the work with the video card. To implement the plan, again, you need to open the “Control Panel” Video cards, go to the already familiar “Manage 3D parameters” tab and select a game in the list with programs, then find “Vertical sync pulse” and click on it to set the “Fast” parameter in the menu.
- Delete temporary folders, unnecessary files, and cache. On the Internet, you can find a bunch of different programs that help you do this. We recommend using BleachBit or CCleaner for this.
- Defragment or optimize your hard drive. To do this, go to “Hard disk properties” Service tab “Defragmentation” or “Optimization”. In addition, you can check/clean the disk there, which helps in some cases.
- At the end of the day, go for a simple design so that your computer isn’t overwhelmed by resource-intensive effects. For example, you can safely disable built-in debuggers, search indexing, and much more.
Best Graphics Card For Comfortable Gaming
Call of Duty Warzone crashes at random or on launch
Below are some simple ways to solve the problem, but you need to understand that crashes can be associated with both game errors and errors related to something specific on the computer. Therefore, some cases of crashes are individual, which means that if none of the solutions to the problem helped, you should write about it in the comments and, perhaps, we will help you sort out the problem.
- First of all, try the simplest option – restart Call of Duty: Warzone, but with administrator rights.
- Be sure to check if Call of Duty: Warzone has conflicts with other applications on your computer. For example, many players often swear at a utility called MSI AfterBurner, so if you use this or any other similar one, disable and try to start the game again.
- It is possible that the game refuses to work adequately because of Windows Defender (aka “Defender” ) or because of antivirus. Therefore, you should go to the options and add the .exe file of the Call of Duty: Warzone launch to the exceptions, or immediately disable the antivirus along with the Defender (they could also delete some vital file for the game that needs to be restored).
COD Warzone DLL file is missing or DLL error
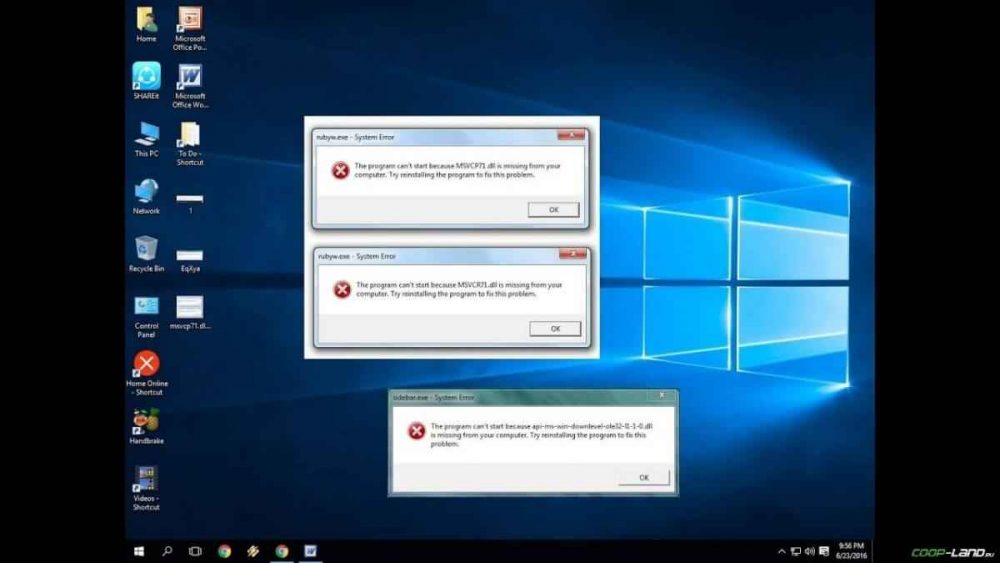
First, we should explain how errors related to DLL files generally occur: during the launch of Call of Duty: Warzone it accesses certain DLL files, and if the game cannot find them, then it instantly crashes with an error. Moreover, the errors can be very different, depending on the lost file, but any of them will have the “DLL” prefix.
To solve the problem, you need to find and return the missing DLL library to the folder. And the easiest way to do this is using the DLL-fixer program specially created for such cases – it will scan your system and help you find the missing library. Of course, not every DLL error can be solved this way, so below we suggest that you familiarize yourself with more specific cases.
Error d3dx9_43.dll, xinput1_2.dll, x3daudio1_7.dll, xrsound.dll, etc.
All errors in the name of which you can see “d3dx” , “xinput” , “dxgi” , “d3dcompiler” and “x3daudio” are treated in the same way – use the web installer of executable libraries DirectX.
Error MSVCR120.dll, VCRUNTIME140.dll, runtime-x32.dll, etc.
Errors with the name “MSVCR” or “RUNTIME” are treated by installing the Microsoft Visual C ++ libraries (you can find out which library you need in the system requirements).
DirectX error in Call of Duty Warzone
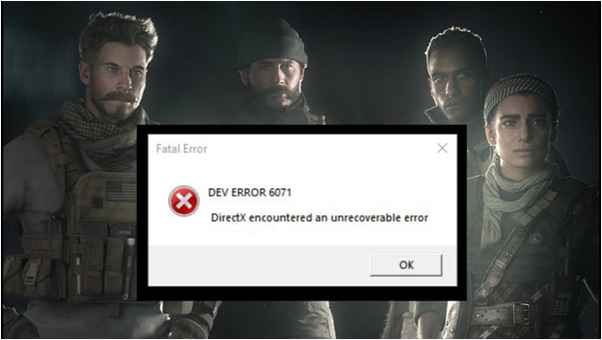
DirectX-related errors can occur specifically when launching Call of Duty: Warzone. Don’t be surprised if one game works well while the other fails. There are usually quite a few such errors, so we have collected the most common ones among users. So if you suddenly get a message “DirectX Runtime Error” , “DXGI_ERROR_DEVICE_RESET”, “DXGI_ERROR_DEVICE_HUNG” or “DXGI_ERROR_DEVICE_REMOVED”, use the instructions below to fix these errors.
- The first step is to install a “clean” version of the driver for your video card (that is, do not rush to install the same GeForce Experience, nothing superfluous from AMD and audio).
- If you have a second monitor, try turning it off, and also turn off G-Sync and any other kind of additional/assistive devices.
- Use System File Checker to repair damaged or missing system files.
- If you are using a video card from Nvidia, then try to enable “Debug mode” in the video card control panel.
- An overheated video card is often the cause of the error, so we recommend using FurMark to test its performance. If this turned out to be true, then you should lower the frequency of the video card.
- If you suddenly encounter other errors, then we recommend reinstalling DirectX, but before that, it is better to delete the old version just in case (in this case, be sure to delete in the folder before reinstalling all files starting with “d3dx9_24.dll” and ending with “d3dx9_43.dll” ).
ALSO READ: Latest Call Of Duty Black Ops Cold War News And Leaks
Call of Duty: Warzone Error 0xc000007b
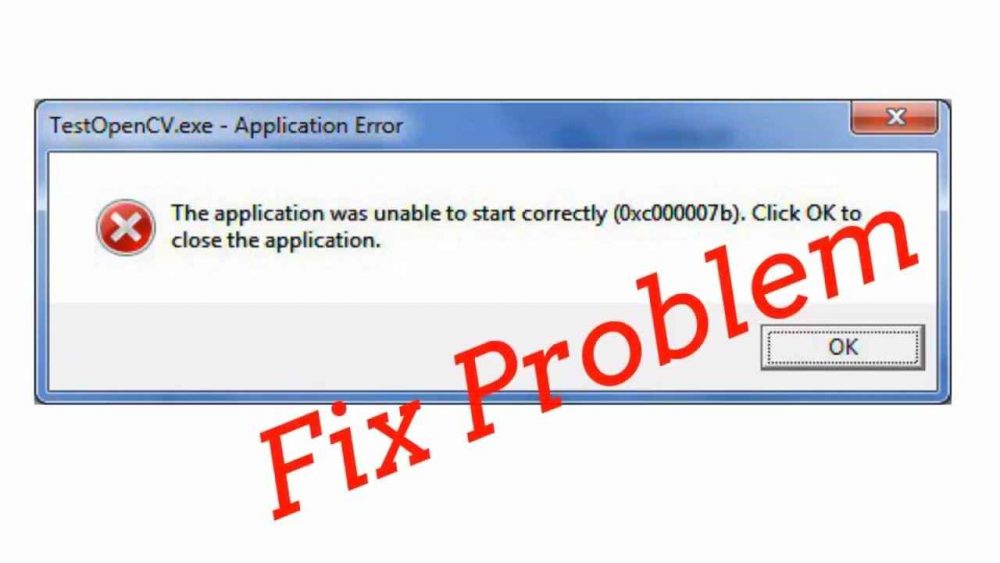 In the worst case, the error 0xc000007b or “This application was unable to start correctly” is associated with corrupted OS system files, and in the best case, with the video card drivers from Nvidia.
Common solutions to the problem:
- The most obvious and easiest way to deal with the error is to reinstall the drivers for the video card, and then run the game as administrator.
- Next, try updating or installing .Net Framework, DirectX, and Visual C ++.
- Alternatively, use the command line (“Start” “Run”), where you need to register the command “sfc / scannow” (the system will scan everything and, if possible, try to replace damaged files if there are cached copies).
- And finally, you should try to remove the software that conflicts with the video driver. Typically, this extra software includes programs that improve graphics.
The second way is the free Dependency Walker 64bit program:
- After installing Dependency Walker 64bit , run the utility and go to the following address: “View” Full Patch “.Exe file of the problematic game” (in some cases, after this a window with errors appears, but you should not pay attention to it, just close the window). Switch to the “Module” section, scroll to the end of the error, look at the values in the columns.
- The CPU column includes all DLLs, they must all be 64-bit for a video game. Therefore, if you notice a DLL file with x86 architecture in the red column of the CPU column, then this means that it is because of this file that the 0xc000007b error occurs.
- As soon as the problematic file is found, it remains to go to the official website dll-files.com and download the 64-bit version of the DLL file there. Find it, download it, place it in the C: \ Windows \ system32 folder, and in the Call of Duty: Warzone root folder, and then check the functionality.
COD Warzone Not enough memory error
There is an error related to insufficient memory for almost a dozen reasons. Of course, the most common ones are either a lack of hardware RAM or a small paging file size. In the latter case, even if you configured anything, everything could easily be spoiled by third-party software or the banal disabling of the paging file.
- You must try to increase the paging file ( “Start” “System parameters” in the line above enter “Performance” choose “Tune the presentation and system performance” “Additionally” “Change” uncheck the “Automatically select …” choose size ).
- It is possible that a certain program, or even several, is causing a memory leak or a virus. To check and a possible solution to the problem, open the task manager, after which you need to sort everything that is by memory consumption.
Sound in Call of Duty Warzone is missing or disappears in the screensavers
Most often, the problem is associated with high audio resolution in Windows settings, namely, with the bit rate and sampling rate. Therefore, there is only one way to get rid of the problem – to lower this resolution.
- In the tray, right-click on the speaker icon.
- In the menu that opens, select the “Sounds” item.
- Next, you need to select a device (it can be either speakers or headphones) and click on “Properties”.
- Go to the next tab “Advanced”.
- Look for the menu called “Default Format” to set a value, but it must be lower than the current one.
- Click “Apply”, open Call of Duty: Warzone, and check the result of the work done.
The problem associated with the lack of sound in the screensavers cannot be solved in the first way, so do the following:
- Again in the tray, RMB on the speaker icon.
- In the menu, look for a function called “Spatial Sound” to disable.
- All that remains is to restart Call of Duty: Warzone and check the result.
And most importantly, do not forget to determine where exactly the sound is missing – everywhere on the computer or only in the game. There are other unlikely, but quite possible reasons for the lack of sound: the sound card is too old, therefore does not support DirectX; incorrect settings; incorrectly installed drivers for the sound card; or some specific error in the operating system. In such cases, be sure to write in the comments, and we will try to help fix the errors!
Black screen appears in Call of Duty Warzone
The appearance of a black screen in Warzone is often associated with a conflict between video drivers and software. And least of all with certain Call of Duty: Warzone files. However, there are quite a few other reasons associated with the appearance of the “black screen of death”.
The first step is to update the video driver when a problem occurs. Many people neglect this at all, but we strongly recommend that you do this, because, for many modern games, important updates are also released that help to launch this or that game.
- Drivers installed/updated but Call of Duty: Warzone still refuses to work properly? Then you need to check the software, are the necessary libraries installed at all? First of all, check for the Microsoft Visual C ++ and .Net Framework libraries, as well as for the “fresh” DirectX.
- If none of the above has given the desired result, then it’s time to resort to a radical solution to the problem: launch Call of Duty: Warzone, and when a black screen appears, press the Alt + Enter key combination to switch the game to windowed mode. So, perhaps, the main menu of the game will open and it will be possible to determine the problem in the game or not. If you managed to switch to windowed mode, then go to the game settings of Call of Duty: Warzone and change the resolution (it often happens that the discrepancy between the resolution of the game and the desktop leads to conflict, due to which a black screen appears).
- This error can also be caused by various video capture programs and other video effects-related applications. And the reason is simple – conflicts appear.
- And finally – the problem, most likely, can be associated with the technical component of the “hardware”. The video adapter can overheat, as can the bridges on the motherboard, which entails reduced power consumption of the video card. We will not go into detailed technical details, so we just recommend that you absolutely clean your car from dust and also change the thermal paste!
A colored screen appears
The appearance of a colorful screen is often associated with the fact that two video cards are used at once. If the motherboard has an integrated GPU, but you play on a discrete one, the game will start on the integrated one anyway. Therefore, there are “color” problems, since the monitor is connected by default to a discrete video card.
No less often, a color screen appears if there are problems with the image display. This causes a variety of reasons, but there are two most common:
- There are outdated drivers.
- Your video card is not supported.
Therefore, we recommend that you update the driver first.
Call of Duty Warzone image flickers
Typically, the problem is related to an overheated video card. The first step is to check the wires, they suddenly blocked the cooling fans, but if there is complete order, then it’s time to reset the overclocking of the video card: you need to enter the MSI Afterburner application (or similar) and click on “Reset”.
Mouse, keyboard, or controller not working
Most often, if such problems arise, it is strictly on the player’s side. In the process of connecting a new device, the OS immediately tries to install the necessary driver package, but the problem is that it is standard, which means it will not be compatible with every device, so check for the necessary drivers. In addition, viruses can affect control, so be sure to check your system.
And finally, as an option, you should try to delete all USB devices registered by the computer. Do not touch only the software that is associated with the main devices (gamepad, keyboard, mouse, wireless adapter), and then be sure to restart your computer. It is possible that there was a conflict and because of this, the control does not work.
Call Of Duty Warzone Common network errors
Call of Duty Warzone Can’t see friends
An unpleasant misunderstanding, and in some cases even a bug or error (in such cases, none of the methods below will help, since the problem is related to the servers). It is curious that many players are faced with this, and it does not matter in which launcher they have to play. We noted for a reason that this is a “misunderstanding”, since, as a rule, the problem is solved by the simple methods described below:
- Make sure that you and your friends are going to play in the same game region, the same download region is set in the launcher.
- If the above method did not help, then it’s time to clear the cache and run a file integrity check.
- The most radical way to solve the problem is to completely reinstall the launcher. In this case, be sure to delete all files associated with the launcher so that nothing remains on the computer.
- Specifically for “Steam” there is another simplest way to solve the problem: choose any section “Library” or “Community” you like, then go to the open tab in “Steam” “View” “Friends” “Games” “Help”. And then in the section with friends, in the drop-down menu, check the box next to the item “Online” (or rearrange the status, but go back to where you are online).
Server creator needs to open ports in firewall
Many problems in network games are connected precisely with the fact that the ports are closed. There is not a single living soul, a friend does not see the game (or vice versa) and there are problems with the connection? It’s time to open ports in the firewall, but before that, you should understand how “it” works. The fact is that programs and computer games that use the Internet require not only trouble-free access to the network to work but also open ports. This is especially important if you want to play an online game.
Ports on a computer are often closed, so they should be opened. In addition, before configuring, you need to find out the port numbers, and for this, you first need to find out the IP address of the router.
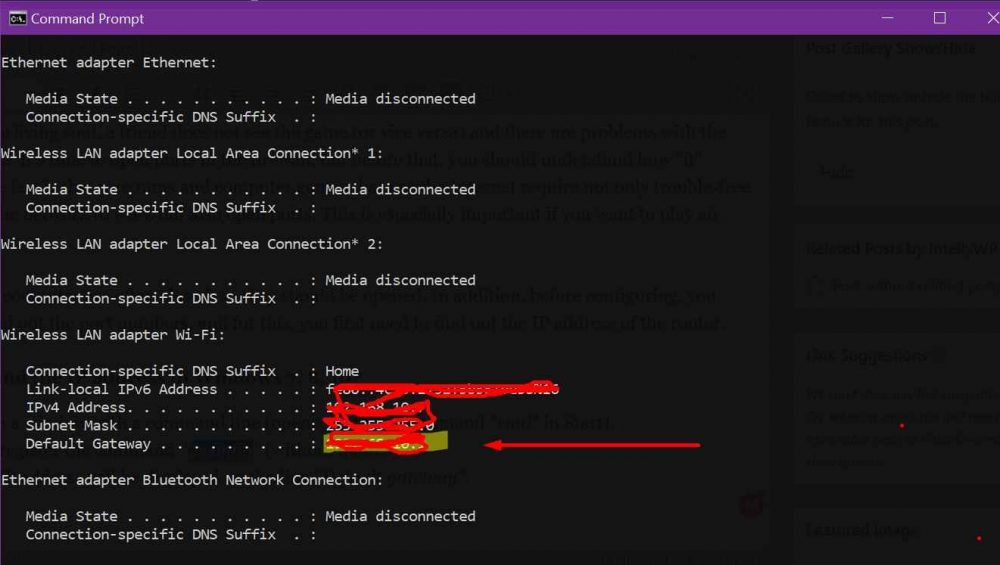
How to find the IP address in Windows 7, 8, 10?
- Open a window with a command line (opened with the command “cmd” in Start).
- You register the command “ipconfig” (without quotes).
- The IP address will be displayed on the line “Default gateway”.
How to find out port numbers in Windows 7, 8, 10?
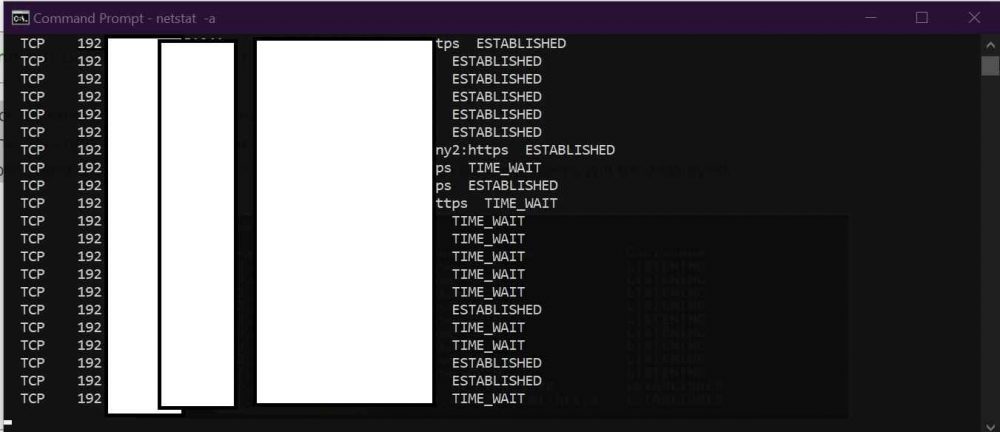
- Open the command line using the “cmd” command in Start.
- Re-write the “ipconfig” command without quotes.
- Run the command “netstat -a”, after which a complete list with port numbers will be displayed.
How do I open ports in the firewall?
- Be sure to make sure that you have Windows administrator rights.
- You need to go to the firewall settings: “Start” “Control Panel” “Firewall”. You can also use the “Win + R” keyboard shortcut, then enter the command “firewall.cpl” in the window (this method is better because it is relevant for any version of Windows OS, so if there is no “Start” button, use it).
- Go to the “Advanced Options” tab In the column on the left select “Rules for suitable connections” In the column on the right, select “Create Rule”.
- In the window that opens, select the one where it says “For the port”, click “Next”.
- In the next window, you need to decide on the protocol: 1 – “TCP”, 2 – “UPD”. In the field below, select the item “Specific local ports” and enter your ports. If suddenly there are several ports, then you need to list them either using a comma or specifying the range of these ports using a dash. Click “Next”.
- Now the little things: select “Allow the connection” “Further” select connection profiles, “Next” specify a name for the newly created rule, and if you want, you can add a description. All that remains is to save all the changes and you’re done.
Over to you


